
Written by Baylor Meche
In today's tech-savvy age, more artists are opting to create their work digitally on tablets or computers than ever before. One of the more popular programs, Procreate, has creatives dropping the pen and paper and exploring this new medium. One reoccurring question is "how do I make sure my digital artwork is translated into high quality prints?" In this article, we'll go over some key tips to ensure your art is ready for printing!
1: Size Does Matter
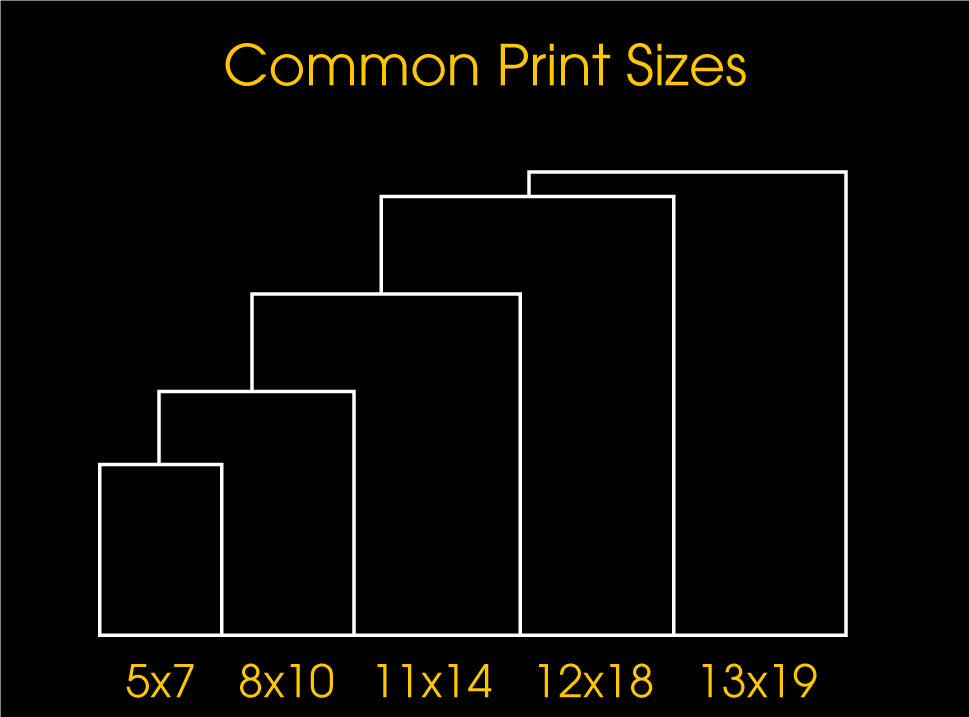
Before you get to creating, it's important to prepare your canvas dimensions properly. Most prints are created in one of several industry standard sizes. For example, 11x14 is one of the most common art print sizes. Choosing a standard size makes it easier for not only print shops but also customers who want their art framed. Creating art on a smaller canvas will result in pixelated, low quality prints when blown up to a larger size. So if you're unsure of the final size of your art prints, going big is always safer than starting small.
Once you've decided on the size you'd like your prints to be, create a new custom canvas and head to the Dimensions tab. From there, you'll want to change the default metric from pixels to inches and make sure the DPI is set to 300 or higher.
2: Color Profiles Are Key
After getting your canvas to the right size, you're going to want to take a look at the color profile tab. You've probably heard of the terms RGB and CMYK before, but do they make a difference? The answer is Yes! Procreate defaults to RGB which uses a combination of red, green, and blue light to create the colors you see on your screen. If your art is mainly for digital purposes such as Instagram or an online portfolio this is the profile for you.
The RGB profiles in Procreate are very limited but keep in mind if you are ever scanning originals or printing Giclee's you want to use Adobe 1998 RGB color space. Most printers, however, are CMYK so you will need to check with your printer and create your digital files in CMYK (read below)
If one of your goals is to make and sell art prints then CMYK GRACol 2006 should be your choice. Working in this profile will ensure your art will look much closer to the final result of your prints. This is because most printers use a combination of cyan, yellow, magenta, and black inks rather than RGB to print.
3: Choose the Best File Type
Once you've set up your canvas and poured your soul onto the screen, it's time to save your file and send it to the printer! There are several options for saving your files in Procreate, but not all of them are equal. If your canvas is the appropriate size for your prints, a PDF is the best option to ensure no quality is lost. PNG files can be acceptable too, however we recommend using a PDF when printing at Mindzai. JPEG should only be used when trying to share a file of your art digitally due to their much smaller size. Keep in mind, TIFFs are preferred for Giclee printing.
Following these steps will ensure your Procreate artwork results in prints both you and your customers will love. So get out there and start creating!



3 comments
Mindzai Creative
Nicholas, thank you for bringing that up! Since most of our customers are based in the U.S. we tend to use inches as the standard for printing. This article refers to inches, however a blog about converting inches to centimeters could be beneficial in the future.
nicholas williams
Some good info But no info about units used for common print sizes! Centimetres of inches?
Karen Towle
Thank you so much for this information! I have been looking all over the web on how to be able to create on my ipad pro using Procreate and upload my designs directly to a printing company without having to learn how to also use AI or PS. the technical side of the art business is whats holding me back from selling my designs on items like tea towels, art prints, fabrics, etc.